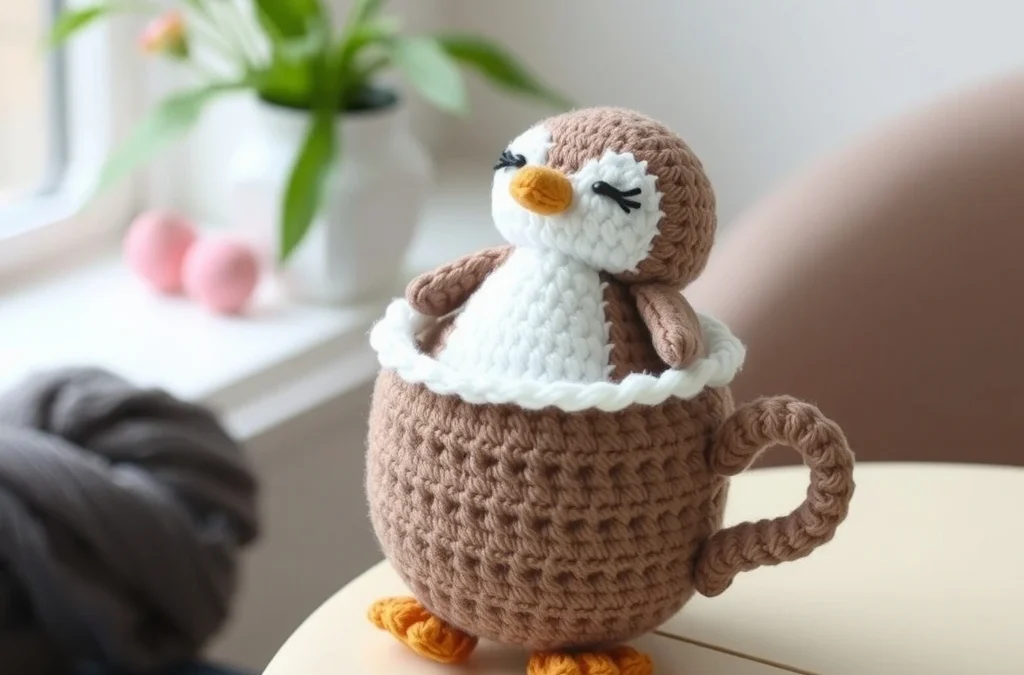
There is nothing quite like holding a warm cup of cocoa on a freezing winter afternoon, unless, of course, that cup of cocoa happens to be harboring an impossibly cute little penguin! Welcome to your new favorite winter amigurumi project: the Cozy Crochet Peppermint-Mocha Penguin in a Glass Mug. This whimsical design combines the comforting textures of a rich coffee beverage with the undeniable charm of a sweet plush penguin, complete with whipped cream, a candy cane stripe, and a cozy clear mug to hold it all together.
As a Certified Master Crochet Designer, I have carefully engineered this pattern to ensure seamless construction, mathematically precise stitch counts, and a professional finish. Whether you are looking to expand your holiday market inventory, craft a memorable handmade gift, or simply treat yourself to a delightful desktop companion, this pattern provides clear, step-by-step instructions. Grab your favorite yarn stash, your trusty crochet hook, and let’s dive into making this utterly charming peppermint-mocha masterpiece!
Materials, Yarn & Hook Requirements
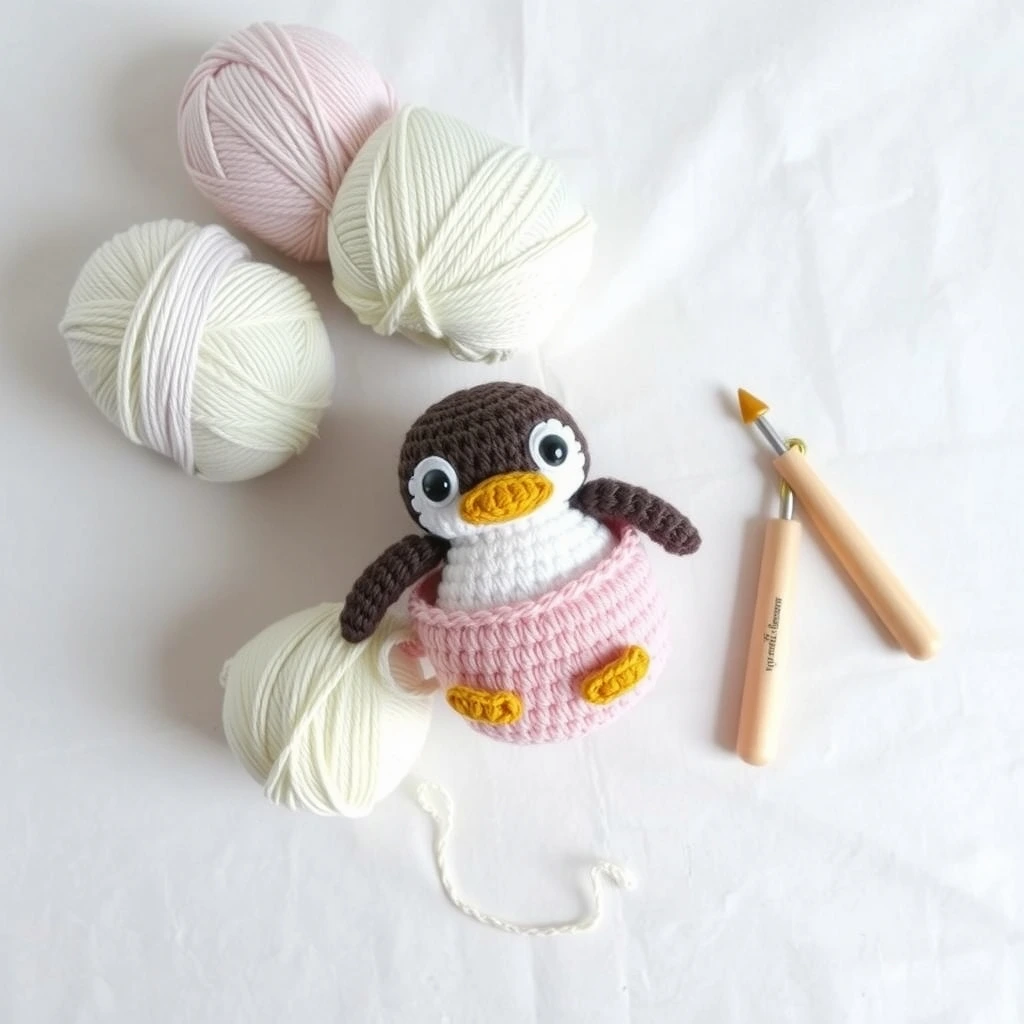
| Item | Specification / Color | Suggested Brand |
|---|---|---|
| Yarn A (Penguin Body) | Worsted Weight – Dark Brown | Lion Brand Vanna’s Choice (Chocolate) |
| Yarn B (Penguin Belly) | Worsted Weight – Cream | Lion Brand Vanna’s Choice (Linen) |
| Yarn C (Beak & Feet) | Worsted Weight – Orange | Red Heart Super Saver (Bright Yellow/Orange) |
| Yarn D (Mug) | Worsted Weight – Clear/Transparent Texture (Light Blue or White) | Caron Simply Soft (White) |
| Yarn E (Whipped Cream & Scarf) | Worsted Weight – Red & White | Red Heart Super Saver (Cherry Red & White) |
| Crochet Hook | US Size E/4 (3.50mm) | Clover Amour Hook |
| Notions | Polyfill stuffing, safety eyes (8mm), yarn needle, stitch markers, scissors | Standard Amigurumi Toolkit |
Stitch Abbreviations & Gauge
- ch: chain
- sc: single crochet
- hdc: half double crochet
- dc: double crochet
- inc: single crochet increase (2 sc in the same stitch)
- dec: invisible single crochet decrease (sc 2 stitches together in front loops only)
- Rnd / Row: round or row
- st(s): stitch(es)
- FO: fasten off
Gauge: 6 sts and 6 rows in sc = 1 inch using a 3.50mm hook. Maintaining a tight, even tension is crucial to prevent the polyfill stuffing from showing through your amigurumi stitches.
Step-by-Step Written Crochet Pattern
1. Penguin Body (Yarn A – Dark Brown)
Rnd 1: Start 6 sc in a Magic Ring (6)
Rnd 2: Inc in each st around (12)
Rnd 3: [sc in next st, inc in next st] 6 times (18)
Rnd 4: [sc in next 2 sts, inc in next st] 6 times (24)
Rnd 5: [sc in next 3 sts, inc in next st] 6 times (30)
Rnd 6 – Rnd 12: sc in all 30 sts (30)
Rnd 13: [sc in next 3 sts, dec] 6 times (24)
Insert safety eyes between Rnd 9 and Rnd 10, about 6 stitches apart. Begin stuffing the body firmly.
Rnd 14: [sc in next 2 sts, dec] 6 times (18)
Rnd 15: [sc in next st, dec] 6 times (12)
Rnd 16: dec 6 times (6)
FO, weave in the tail to close the gap.
2. Penguin Belly Patch (Yarn B – Cream)
Rnd 1: Start 6 sc in a Magic Ring (6)
Rnd 2: Inc in each st around (12)
Rnd 3: [sc in next st, inc in next st] 6 times (18)
Rnd 4: [sc in next 2 sts, inc in next st] 6 times (24)
FO, leaving a long tail for sewing. Sew the belly patch onto the front center of the penguin body over Rnd 5 through Rnd 12.
3. Beak (Yarn C – Orange)
Rnd 1: Start 4 sc in a Magic Ring (4)
Rnd 2: [sc in next st, inc in next st] twice (6)
FO, leaving a tail. Sew the beak directly between the safety eyes centered on the face.
4. Wings (Make 2 – Yarn A – Dark Brown)
Rnd 1: Start 5 sc in a Magic Ring (5)
Rnd 2: Inc in each st around (10)
Rnd 3 – Rnd 5: sc in all 10 sts (10)
Rnd 6: [sc in next st, dec] 3 times, sc in last st (7)
FO, leaving a long tail. Flatten the wings slightly (do not stuff) and sew them to the sides of the penguin body.
5. Glass Mug (Yarn D – White/Clear)
Rnd 1: Start 6 sc in a Magic Ring (6)
Rnd 2: Inc in each st around (12)
Rnd 3: [sc in next st, inc in next st] 6 times (18)
Rnd 4: [sc in next 2 sts, inc in next st] 6 times (24)
Rnd 5: [sc in next 3 sts, inc in next st] 6 times (30)
Rnd 6: [sc in next 4 sts, inc in next st] 6 times (36)
Rnd 7: Working in back loops only (BLO), sc in all 36 sts (36)
Rnd 8 – Rnd 20: Working in both loops normally, sc in all 36 sts (36)
Rnd 21: [sc in next 5 sts, inc in next st] 6 times (42)
Rnd 22: Slip stitch around all 42 sts for a neat finished top rim. FO and weave in ends.
6. Mug Handle (Yarn D)
Row 1: Ch 8, turn, starting in the 2nd ch from hook, sc in next 7 sts (7)
Row 2: Ch 1, turn, sc in all 7 sts (7)
FO, leaving a long tail. Sew the handle securely to the exterior of the glass mug between Rnd 10 and Rnd 18.
7. Whipped Cream & Peppermint Topper (Yarn E – White & Red)
Using White, ch 30 loosely. Starting in 2nd ch from hook, work 3 hdc in each chain across to create a natural spiraling corkscrew shape. FO.
Using Red, surface crochet or embroider candy-cane diagonal stripes onto the whipped cream swirl. Place the whipped cream inside the top of the mug, wrapping it snugly around the penguin’s lower half, and tack down with a few stitches.
Customization & Care Instructions
Feel free to customize your peppermint-mocha penguin by swapping out the scarf colors for traditional Christmas green, or by adding a tiny crocheted gingerbread charm to the mug’s handle! To care for your finished amigurumi plushie, spot clean gently with a damp cloth and mild soap. Do not submerge completely in water or machine wash to protect the internal polyfill and structural integrity.
Frequently Asked Questions (FAQ)
Can I use a different yarn weight for this pattern?
Yes, you can use DK or bulky weight yarn, but remember to adjust your hook size accordingly and keep your stitches tight to ensure the stuffing does not peek through.
How do I make the mug stand up straight?
Inserting a plastic cardboard or plastic canvas disc inside the bottom of the mug during construction provides a flat, sturdy base that keeps the entire project upright.
Are safety eyes safe for small children?
Safety eyes are securely locked, but for infants and toddlers under the age of three, it is always recommended to embroider the eyes using black yarn or embroidery floss as a safer alternative.
Is this pattern suitable for complete beginners?
This pattern is designed for advanced beginners to intermediate crocheters. You should be comfortable working in the round, executing invisible decreases, and basic amigurumi assembly.
Conclusion
Congratulations on completing your Cozy Crochet Peppermint-Mocha Penguin in a Glass Mug! This delightfully festive project is sure to bring smiles, warmth, and handmade holiday cheer to any space it inhabits. Be sure to pin this pattern to your favorite Pinterest crochet boards, share your finished photos with our crafting community, and keep your hooks moving for your next creative adventure!
More Free Crochet Patterns You'll Love
 Amigurumi & Plushies
Free Blueberry Muffin Hamster Crochet Pattern & Tutorial
View Free Pattern → Amigurumi & Plushies
Cozy Crochet Honey-Lemon Duckling in a Ceramic Teacup Free Pattern
View Free Pattern → Amigurumi & Plushies

Leave a Reply